Annotate
Once the ST and TT tokens are aligned, you may want to annotate the aligned data. This page provides step-by-step guidance on creating and applying an annotation schema.
Set up an annotation schema
You can either create a new annotation schema or fork an existing default schema.
Creating your own schema
Go to Dashboard and select View My Studies. In the new window, click Manage Schemas in the upper-right corner. Then click Create New Schema, enter a Schema Name and choose the access level: Private or Public.
Here we created a private error classification schema for demonstration.
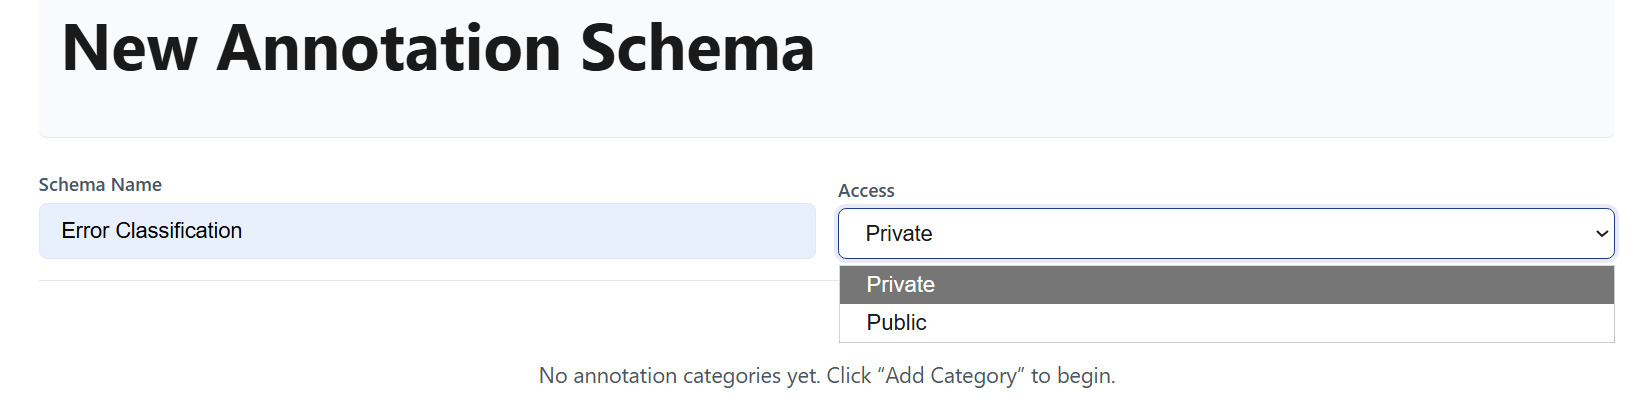
Next, set up the annotation categories as follows.
Click Add Category → Assign a Hotkey → Set a Category Code (for reference only; not displayed on the tokens) → Enter a Display Name (shown on the aligned tokens) → Choose where the category can be applied: Source only, Target only, Both sides, or Either side (for unaligned tokens) → Select the Color and Icon for the category.
Tip
Within each category, you can add multiple severity levels: Neutral, Minor, Major, and Critical.
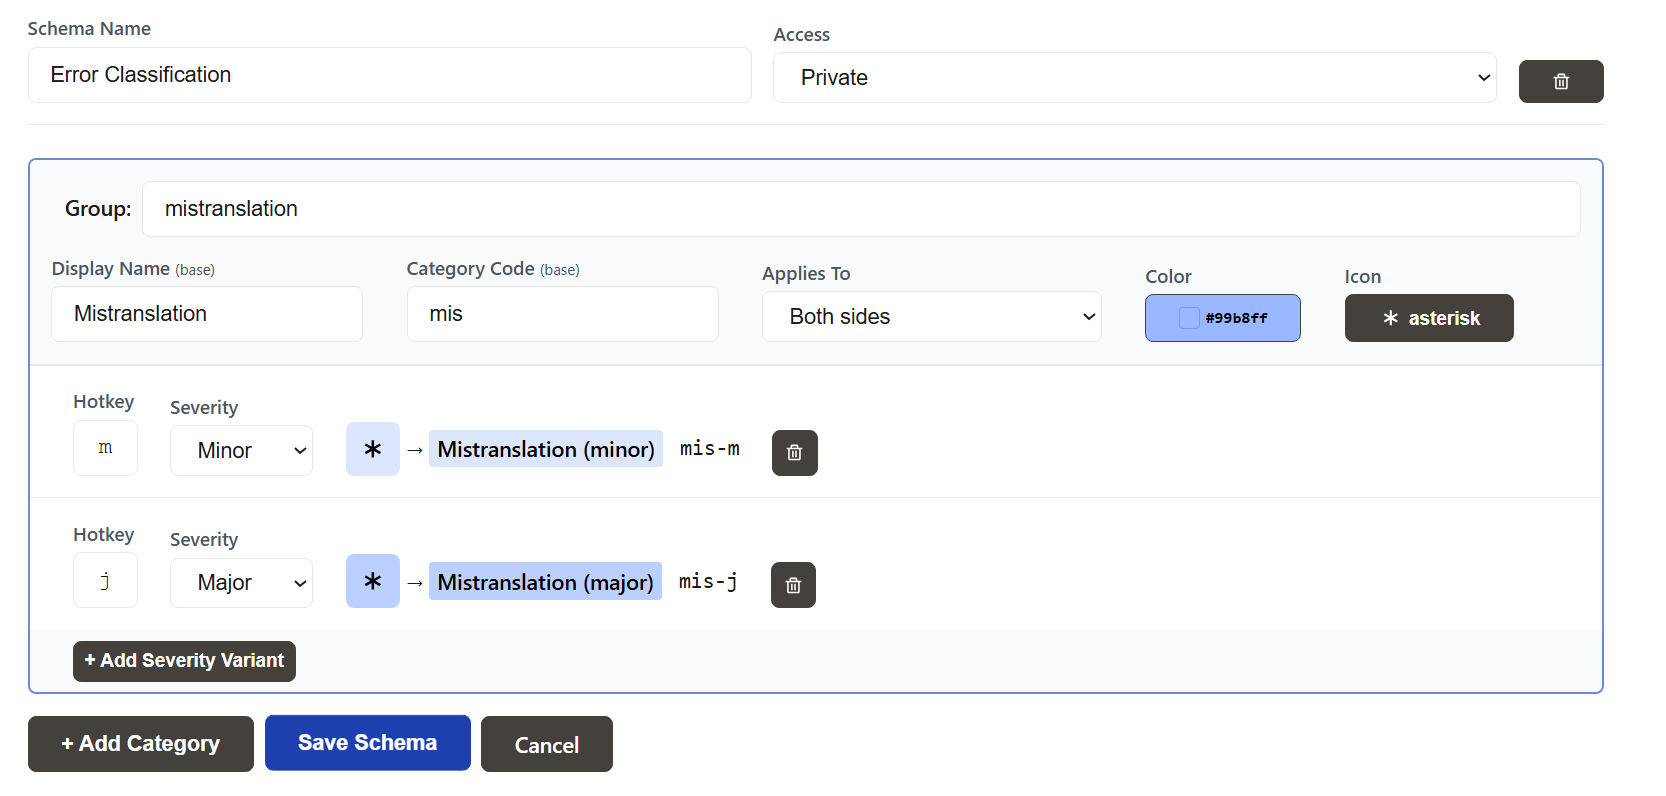
In this example, we create a category named Mistranslation and define two severity levels: minor and major.
After setting up the categories, click Save Schema.
Forking a default schema
Instead of creating a new schema from scratch, you can adapt one of the existing default schemas.
Navigate to Dashboard and select My Studies. After opening Manage Schemas, click Fork for the desired schema.

Next, modify the schema as needed in the editing interface.
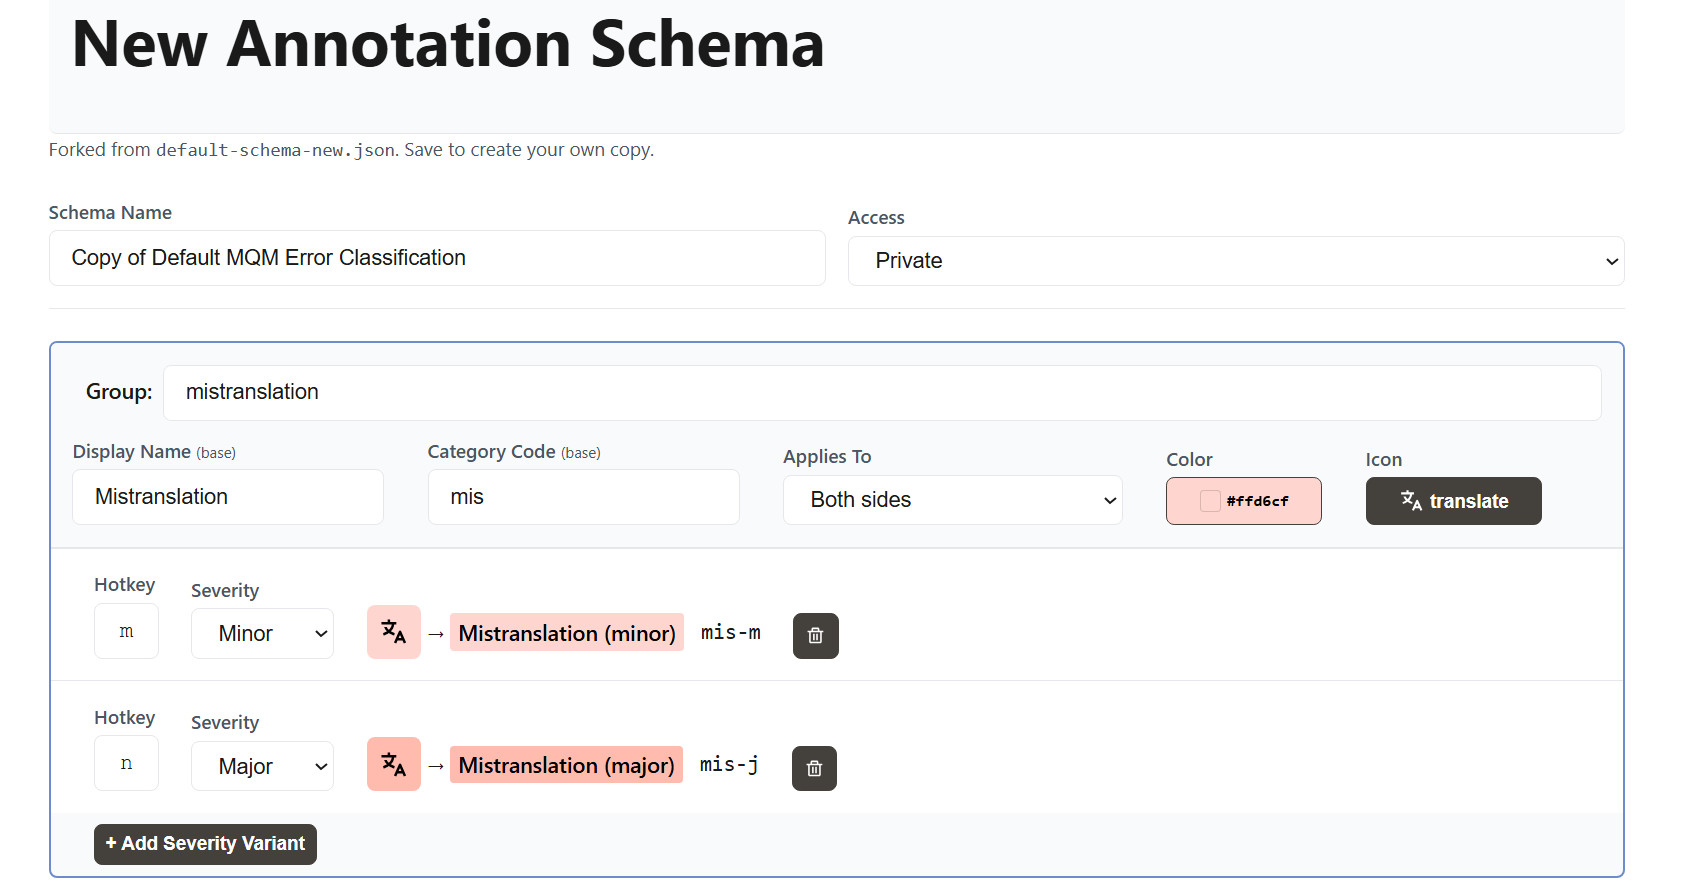
The remaining steps are identical to those for setting up the annotation categories when creating a new schema.
2. Apply the annotation schema to aligned tokens
Once you have an annotation schema, you can apply it to your aligned tokens.
Right-click the token(s) you want to annotate to open the options menu. Then, select an annotation category or use the predefined hotkey to apply the annotation.
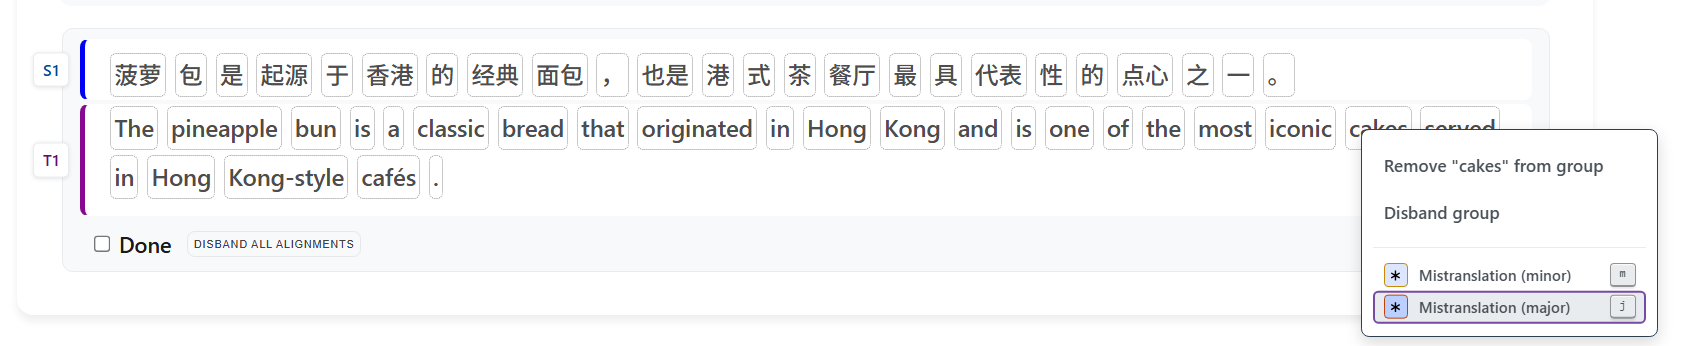
In this example, the aligned tokens 点心 and cake are annotated as Mistranslation (major).
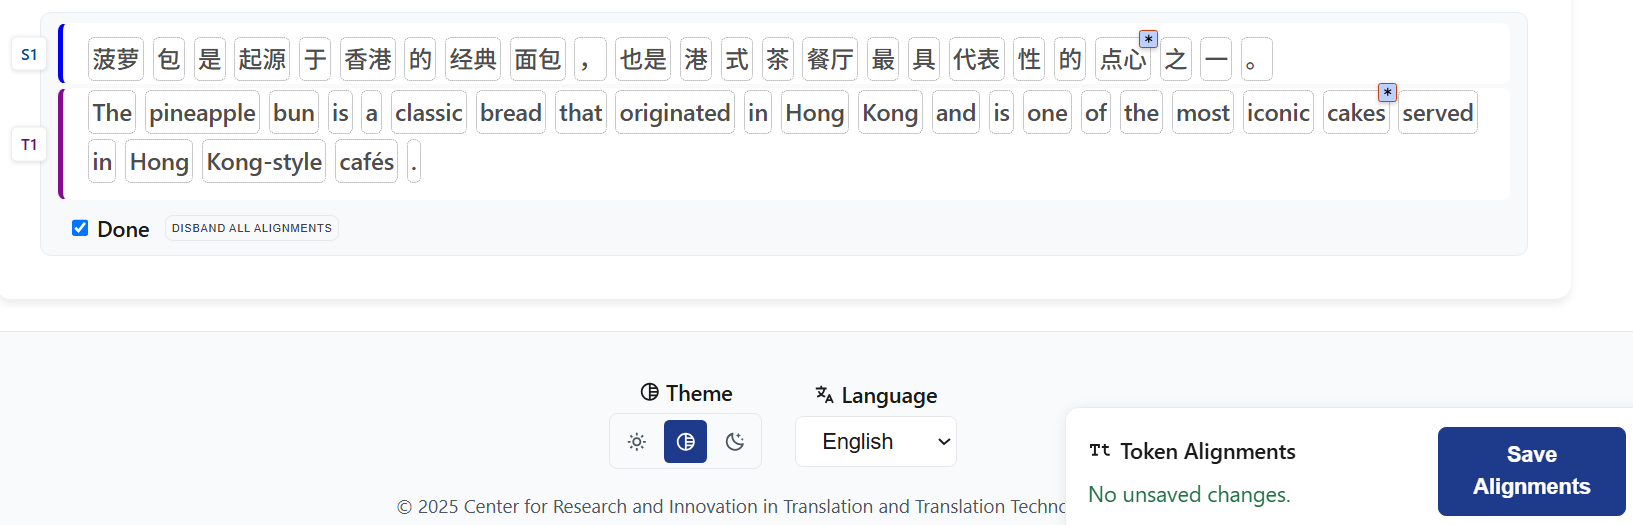
An asterisk, the predefined icon for this category, will appear on the annotated tokens to indicate that the annotation has been applied.
Tick Done or click Save Alignments to save your annotations.
Note
·Each study can use only one annotation schema. You cannot assign different annotation schemas to different sessions within the same study.
·Once annotations have been added to any session using the current annotation schema, you cannot switch to a different schema until those annotations are removed.
·To remove an annotation, right-click the annotated tokens and select the same annotation category again.
·After making any changes, don't forget to click Done or Save Alignments to save your work.📝
View public annotated datasets
Some public studies, such as DG21error and AR22, include annotations. You can view these annotations by opening the aligned ST and TT.
Navigate to Dashboard, then click the eye icon in the rightmost column. Select View Sessions, after which click Open Aligner.
The following example is taken from AR22.

To see what each icon represents, click Annotation Schema.
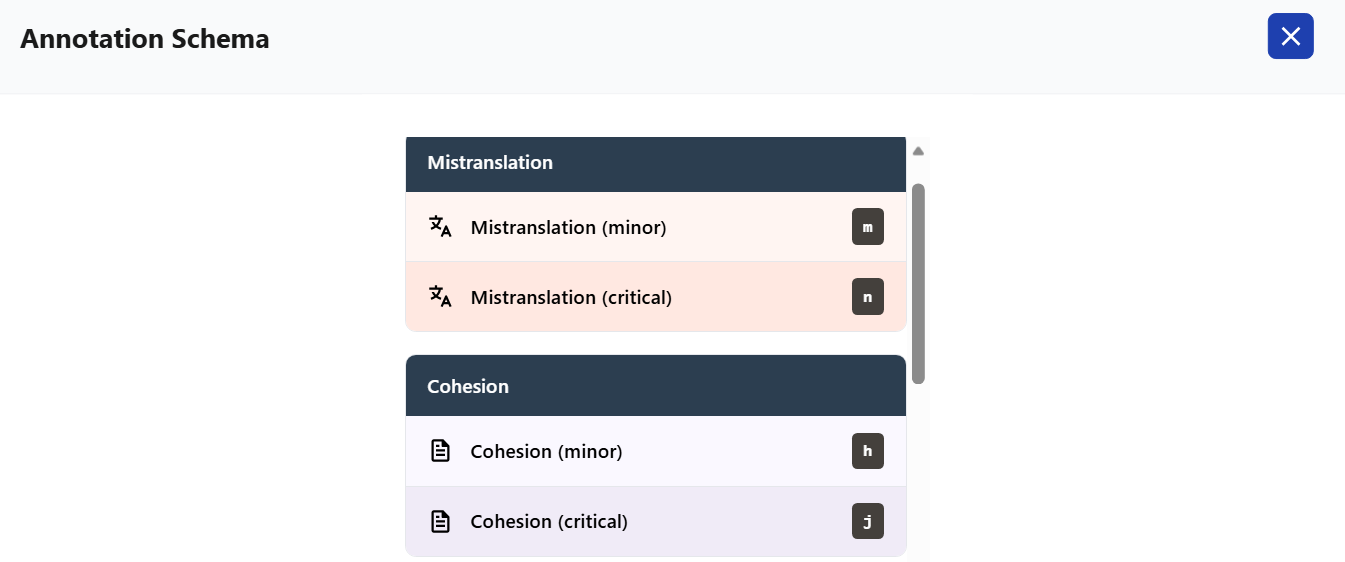
By referring to the schema, we know that the Arabic translations of in and early are annotated as Critical Mistranslation and Critical Cohesion, respectively.